Preserving Party Memories
and Scrapbook Ideas
They make you smile, laugh and sometimes cry. They remind you of the good times in life, help tell stories and introduce children to long lost relatives. In fact, photos enrich our lives like very few objects do.
Anyone who knows me will tell you that I am a picture freak. I always have a camera at the ready, not only for special occasions, but even for the seemingly boring moments in the lives of my family and friends.
They often complain and grumble about having their picture taken, but it's funny how they always gather around when the pictures are ready for viewing. It's just plain fun to relive a moment and to see yourself in print!
I have been into photography and preserving memories for years. I think the obsession began when my elderly relatives, namely my Aunt Maude and Grandma Honey (shown below with my kids), were approaching the age of 90 years old.

They had a drawer full of pictures that were all curled up and not in very good condition. When I would visit them, we always spent time going through the pictures in the drawer.
They could always tell me exactly who each person was, even though it was clear that the pictures were ancient, BUT there were no names or dates on any of them!
The next time I'd visit, we do it again. I'd ask who was in the picture, they'd recall from memory who the people were.
Who The Heck Are These People?
It was about this time in my life that I started to enjoy visiting antique stores. I would see all of these beautiful, framed pictures on the walls of nameless people and always wondered who these people were. Why were their pictures being sold at an antique store?
It finally occurred to me that these pictures were probably being sold because some relative did not even know who they were. There were probably no names on the pictures and so they were given away like a useless piece of trash.
I vowed that would not happen to my family and began obsessing about getting names and dates on the backs of those pictures in the drawer and eventually got them into scrapbooks. I didn't have much time left with my elderly relatives, I knew.
My Grandma Honey and Aunt Maude have since passed away, but my family knows the names of the people in those pictures and they will not end up on the walls at an antique store.
Taking pictures and preserving the moments of your life is priceless. My hope is that by sharing my experience, you will become a life long advocate yourself and provide your family and friends with precious memories for years to come.
Sharing Your Photos
Now that you have the photos, what are you going to do with them? If you are like most people, you'll view the pictures on your computer or from the envelope that they came in and that will be the end of it. They will be filed away never to be seen again.
That is a shame. I know, because I have boxes and boxes of photos that are rarely seen because it's too difficult to get at them. Conversely, I also have several scrapbooks and unique photo gifts that are just a joy to look at. To me, they are family heirlooms that I can't even put a price on.
There are several different ways to share your photos. Below are a few of my scrapbook ideas and recommendations for digital viewing and personalized photo gift ideas.
8-1/2 x 11 Handmade Scrapbook
Although these take a lot of time to make, they can not be beaten for quality and uniqueness. I have made several of these scrapbooks and the idea came to me after going to an event and afterwards several people asked me for copies of my photos.
It seemed like a hassle to make a bunch of prints and then hand each person an envelope full of random pictures. Plus I wanted to tell the whole story, in pictures and words. Most importantly, I wanted to give them something special to remember the event.
How To Make A Handmade Scrapbook
Mount prints on 8-1/2 x 11 white card stock. In addition to the prints and card stock, I recommend getting a small paper cutter, corner rounder.
I usually put my photos in chronological order first, crop them to size, round the corners (personal preference) and then mount them with glue sticks.
In addition to the photo pages, adding a one page family tree or an itinerary page can really help tell the story. My scrapbooks usually end up being 20-40 pages with 3 to 5 pictures on each page. Most digital scrapbooks can not accommodate as many pictures as a handmade scrapbook.
Put words to the pictures. After I get all the pictures mounted onto the card stock pages, I bring them to my computer and simply go through each page and type into a blank Word document the captions for each picture.
When I began making these books, I purchased a disk of really cool fonts called "The Best of Creative Lettering" from "Creating Keepsakes Magazine." If you want some great scrapbook ideas, check out this magazine.
After I get all the captions that I want into a Word document, I print them, and mount each one by the appropriate picture using glue sticks.
Embellish the pages. Now that the pictures and captions are mounted, I dress up the pages with memorabilia, such as, golf score cards and ticket stubs, and I add scrapbook stickers to limit the amount of white space. Do not use metallic stickers as they do not copy well.
Copy, Laminate and Coil. The cheapest way to make copies of your original pages is to go to a copy place, like Kinkos or Reprographics, and make the color copies yourself (bring your own cardstock). It is more expensive, but they will do it for you if you prefer.
This is the best part of making a handmade scrapbook of this kind. You can make as many copies of the original scrapbook as you like and everybody gets a copy of their own to take home. You can not do that with scrapbooks made in those big, fancy albums.
Another great scrapbook idea is to laminate the front and back covers. It makes them more durable and really adds to the quality of the book.
Lastly, the scrapbooks need to be bound. I like to use the black coil type because they hold up well and in my opinion, look more professional than some of the other binding techniques that I have seen.
To give you an idea of what I'm talking about, below are a couple of the scrapbooks I made. Remember I told you about those curled up pictures in the drawer? Well these books are loaded with them.
 |
These are the scrapbooks I made in honor of my Grandma Honey and my Mom. The covers were laminated and a black coil was used to bind them. |
|
A shot of some of the old pictures from the drawer. Now we know who these people are! |
|
This is the family tree I did for my Mom's book. I know you can't see the detail but you can see that it's very simple and easy to do. My goal was only to show my children where they fit in the family tree, which was accomplished with this one pager that I created in Powerpoint. |
Also, in 2004, my family and I went on vacation with 13 other families and I made a handmade scrapbook to commemorate that trip. It ended up being about 40 pages and each family got their own copy. I think it cost about $30 per book.
See this handmade scrapbook at the bottom of my "Vacation in Kissimmee" webpage.
Custom Photo Gifts
If you want photo gifts, like mugs or t-shirts, to be made from your uploaded photos, This Mother's Day, Touch Mom's Heart with a Unique Gift from CafePress offers a great variety of unique photo gifts to choose from. I have used them on several occasions and have been very pleased with the ease of ordering and the quality of the products.
How about putting your photos into a Digital Photo Frame? Some are small enough to fit in the palm of your hand and hold up to 180 photos.
CanvasOnDemand.com is a company that takes your photo and puts it on canvas in any size that you choose. The personalized photo gift idea alone is a good one, but after reading the multiple testimonials and viewing examples of their work, I was sold. I highly recommend this company for perserving party memories and creating gifts for the special people on your list.
Whether you have one of these made for your own home or you give one away as a unique photo gift, this is definitely a "Wow" product. Read about Canvas on Demand photo gifts here.
Photo Wall Art
If you have great pictures from a party that you want to showcase or you just want an interesting way to display family photos, try making a photo wall collage.
Rather than having a bunch of mismatched frames sitting around, a photo wall collage can bring unity and a very clean look to any room.
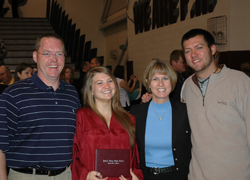
We recently became empty nesters so I wanted to showcase the transition my family has undergone over the past 22 years. An idea was born to make this photo collage for the wall with black and white photos and matching frames.
How I made it
Pick the photos. I chose one of my family when the two kids were very young and one of my family now. Then I found my favorite picture of just the kids when they were little and another one of them now.
Fix the photos. After selecting the four photos, some had to be scanned into my computer while the more recent ones were taken with my digital camera and were already in my computer. I have Adobe Photoshop which I used to fix the photos. They were all different sizes and colors so the first thing I had to do was make them all uniform.
I made them all 5 x 7's by using the function "Image-Size" and then the function "Image-Mode-Grayscale" to discard color. I ended up with four, 5 x 7, black and white photos. This is an important step, in my opinion, because you want them all to match.
Buy the frames. In order to accomplish the uniform look, I also selected four identical frames.
Hang them. Once the four black and white photos were in the frames, I had to decide how I wanted to hang them. The orientation of the photos (portrait or landscape) will help you decide the configuration (across in a straight line, down in a straight line, in a perfect square...).
Two of my photos were landscape and 2 were portrait so I decided to put them in a square with an irregular edge to create visual interest. We hung up the photo collage yesterday and my husband helped to ensure that the frames were all perfectly spaced.
I am quite proud of the end result. Not only do we have inexpensive wall art, but we have something to look at that is so very meaningful and will be cherished for years to come.
Whether you choose to share your photos in a handmade scrapbook, slideshow, photo gift, family website or photo wall collage really doesn't matter. What matters is that you take the pictures in the first place and then make them easily accessible so that they don't end up in a drawer or a closet.
Photographs are one of life's little treasures and they should be treated as such. Hopefully some of my scrapbook ideas and other recommendations will get you thinking about what to do to preserve your precious photographs.


Thoughts? Questions? Opinions?
Have your say about what you just read! Leave me a comment in the box below.