Design Invitations
Using Microsoft Powerpoint And Word
Sometimes, I just do not have the time or energy to design invitations let alone get them addressed and mailed. Obviously it is a necessary task, but I would rather spend my valuable time planning the party, choosing recipes and decorating my house.
 |
 |
| How To Make Powerpoint Invitations | How To Make Microsoft Labels |
Over the years, I have learned to use several short cuts so I can get them out the door as quickly and as effortlessly as possible. Now I am happy to share my tips with you.
How to Make Free Microsoft Powerpoint Invitations
When I am inviting a lot of people to a theme party, I like to design invitations in Microsoft Powerpoint. Learn how by either watching the 10 minute video or by reading my step by step instructions with screenshots.
Powerpoint Invitations Video
Watch this video to learn how to design invitations in Powerpoint or read the step by step instructions below:
Step by Step Instructions
Learn how to design invitation by following these step by step instructions and screenshots below.
If the screen shots are too difficult to read, you may want to print the 7 page Free Booklet entitled How to Create Invitations in Powerpoint. Clicking here will open a new browser window so you can print the 7 screenshots if you prefer.
There are a couple different ways to design invitations in Powerpoint:
One way to design invitations is to create the text and the design in Powerpoint and then print them on plain stock. To create your free Powerpoint invitations using this method follow these easy steps:
- First, open Powerpoint and create a new, blank document (File-New). Then select the orientation of your invitations (File-Page Setup-then pick either Landscape or Portrait; I picked Portrait.
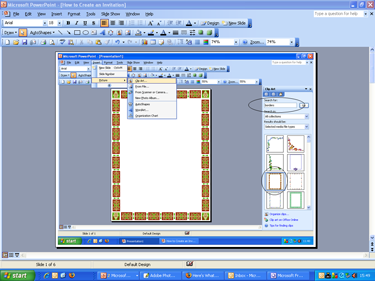
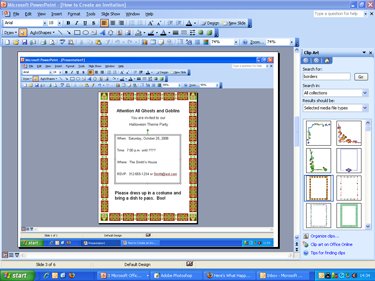
- In the first screen shot below, I added a border to the new document (Insert-Picture-Clipart). A clipart dialog box will open on the right side of your screen. Type in the word borders in the Search For box and scroll through until you find one you like, then click on it (look for the two black circles in the screenshot).
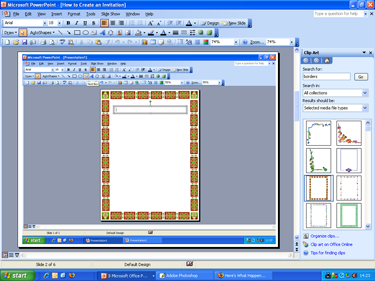
It will appear in your invitation. You can size the border any way you like using the size boxes that surround the image. I had to stretch the border in all directions in order for it to look as it does here. - After you create a border, it is time to create the text. In order to do this you will need to insert text boxes. You can either select the text box icon if it is on your toolbar or select Insert-Text Box-and click in your invitation. Begin typing and your text box will fill in.
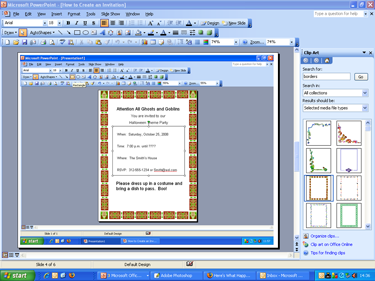
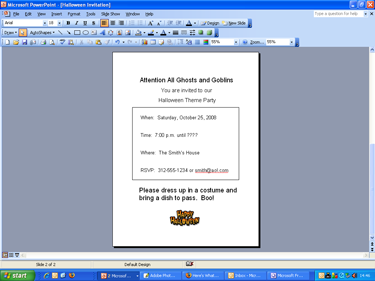
- I like to use more than one text box because it makes it easier to line everything up. In the example below, you can see that I used 3 text boxes; one for the top, one for the middle details and one for the comment at the bottom. Once your text boxes are complete, you can size and color the font by selecting the text and then choosing Format-Font.
- Next, I added a black border around the middle section of text just to break it up a bit. To do this, choose Insert-Picture-Autoshapes. A small dialog box will open giving you shapes to choose from. I used Basic Shapes and then chose the rectangle. Doing so turns your pointer into cross hairs and allows you to draw a box around anything you choose.
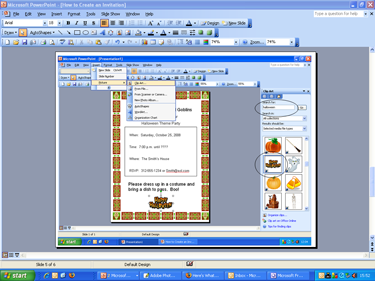
- In my example, I wanted to add a theme party flair so I added Halloween clipart. Choose Insert-Picture-Clipart and type the word Halloween (or whatever) into the Search For box then scroll through until you find one you like. Click on it (look for the two black circles in the screenshot).
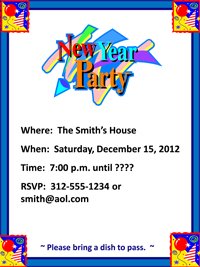
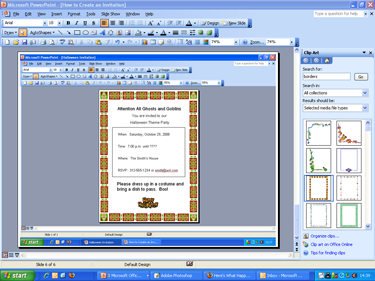
It will appear in your invitation. You can size the clipart any way you like using the sizing boxes that surround the image. - Take a look at the final Powerpoint invitation below using the first method (you created the text and the design). It's very basic and took me about 10 minutes to design. Now all you have to do is print invitations on plain stock using your color printer.
Another way to design invitations is to create only the text in Powerpoint and then print them on purchased stationery that already has the design. To create your free Powerpoint invitations using this method follow these steps:
- To design invitations using this technique, the process is basically the same as above except that you are not going to create a border. First, open Powerpoint and create a new, blank document (File-New). Then select the orientation of your invitations (File-Page Setup-then pick either Landscape or Portrait; I picked Portrait.
- Follow the same instructions above to create text boxes as shown below. Be careful to leave enough room around the perimeter of your invitation so that your text does not overlap any design that might be on your purchased stationery.
- You can add clipart if you choose following the steps above.
- After the invitations are completed, load your stationery into your printer (usually face down) and print invitations.
Once you get good at using these methods to design invitations, you will find this process very reliable when you are looking for quick and easy party invitations.
For more ideas on how to make your own invitations, visit Sweet 16 Party Invitations.
Get The Invitations Ready To Mail
After you design invitations in Powerpoint, you can just send them as an attachment via email, but if you want to mail them, here's the method that I use:
- Fold the invitations into thirds (design inside) then either put them in an envelope or seal them with a sticker. I use gold, round seals that are about 1-1/2 inches in diameter If you use the stickers, ask the post office to manually scan the invitations so they don't tear (as opposed to putting them through the automated machines).
- Apply postage as you normally would with any other piece of mail.
- Whether you choose to hand address your party invitations or use labels, I highly recommend that you keep your addresses in a spreadsheet. I use Microsoft Excel and create the following columns:
- First Name
- Last Name
- Street Address
- City
- State
- Zip Code
Now, you have designed invitations, folded them, the postage has been applied and your addresses are in a spreadsheet and ready to go. It is time to address the invitations.
How to Make Microsoft Word Address Labels
Some people have an aversion to using labels on personal mailings, however I have found them to be a huge time saver and one of the reasons why I have had so many successful parties.
I decided a long time ago that my time is better spent planning the menu and finding cool recipes than hand addressing invitations so I keep my addresses in a spreadsheet and use it to create labels.
Here's how I make labels using Microsoft Word 2003. From the Tools menu:
- Select "Letters and Mailings" then "Mail Merge."
- Under "Select document type" choose "Labels" and click on the "Next" link at the bottom of your screen.
- Under "Select starting document" choose "Change document layout" then click on the "Label options" link.
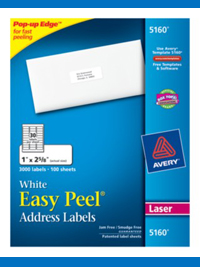
The Label Option dialog box will come up and here's where you choose the kind of label stock that you will be using. Microsoft Word references Avery brand numbers (ex. "Avery # 5160) so it's easy to choose the stock if you are using Avery brand labels.
I use the Office Depot Address Labels. They are less expensive and just as easy to use. On each Office Depot box, they reference an Avery number so that you know what to choose in Microsoft Word. It will say something like "same size as Avery # 5160." There are 3000 labels per box that are 1" x 2-5/8" in size. One box goes a long way.
- Under "Select recipients" choose "Use an Existing List" then select "Browse." This will take you to the dialog box where you normally go to open documents. Find the document that you've previously saved with the addresses (Excel if that's what you used). It's best if your document has only one tab.
- When you select the document, a "Mail Merge Recipient" box will come up. This is where you would edit the list if needed. I usually do the editing in the document before I begin this process so I have no need for this box. Click "OK" and then select "Next" at the bottom of your screen.
- Under "Arrange your labels" select "Address book" This opens the "Insert Address Block" dialog box which gives you a chance to change how your addresses appear, if needed. I usually leave this as is. Click "Next" at the bottom of your screen to preview your labels.
- Last step is to "Complete the merge."
- Load your stock (usually face down) and print the labels!
The interface is very user friendly in Microsoft Word and once you get the hang of it, you will see why I recommend printing labels instead of spending valuable planning time hand addressing party invitations.
I send out almost 100 holiday cards and letters every single year and I simply could not do it without using computer generated labels.
Printing Labels in Microsoft Using Avery Label Download
Sometimes I have struggled using Microsoft Word to import addresses from Excel and printing labels. Last year I ran across some software that makes this job much easier.
You can follow the process I've outlined above or you can download the Avery software and follow the prompts on the screen. What I like about using this software is that you can select your entire spreadsheet of addresses right from Microsoft Excel, open the Avery software and choose the exact Avery label number (for example 5351) and within a few minutes, have all your addresses perfectly printed on Avery labels.
Although I haven't done it yet, you can get pretty fancy, importing your own clipart onto the labels. Why pay so much money for designer labels when you can easily create your own designs with this software?
All you need is the Avery software, a Microsoft Excel address spreadsheet and Microsoft Word. Once you download the free Avery software, this image shows where you will find the Avery Wizard from Excel.
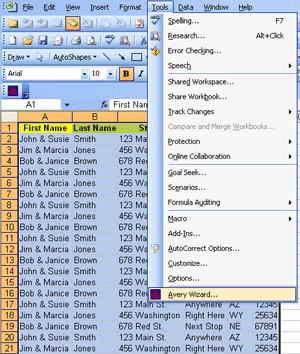
Interested in learning more? Here's where you will find a link to the free Avery label download, full written instructions and a video on how to create Microsoft labels using the Avery software.
Holiday Invitations
Click here for additional ideas on designing Holiday Invitations.


Thoughts? Questions? Opinions?
Have your say about what you just read! Leave me a comment in the box below.